OPC-DA (A.K.A Classic OPC) relies on Microsoft’s COM and DCOM technologies to exchange data between automation hardware and software. It can prove to be truly frustrating to configure DCOM properly for new users of Ignition and/or Autosol Communication Manager (ACM). OPC-DA requires a well-configured DCOM infrastructure to function properly and allow for OPC data to transfer successfully. The following seven steps detail a very effective and proven strategy to establish reliable DCOM communication.
Assumptions:
- This test was done on brand new Virtual Machine instances that have not been tampered with before.
- Ignition server and ACM server are hosted on two different servers or Virtual Machines.
- Both servers are running 64-bit windows (for my purposes I was running Server 2012 on both machines).
- I am running Ignition 7.7.5
Step 1: Install OPC Core Components on the Ignition Server
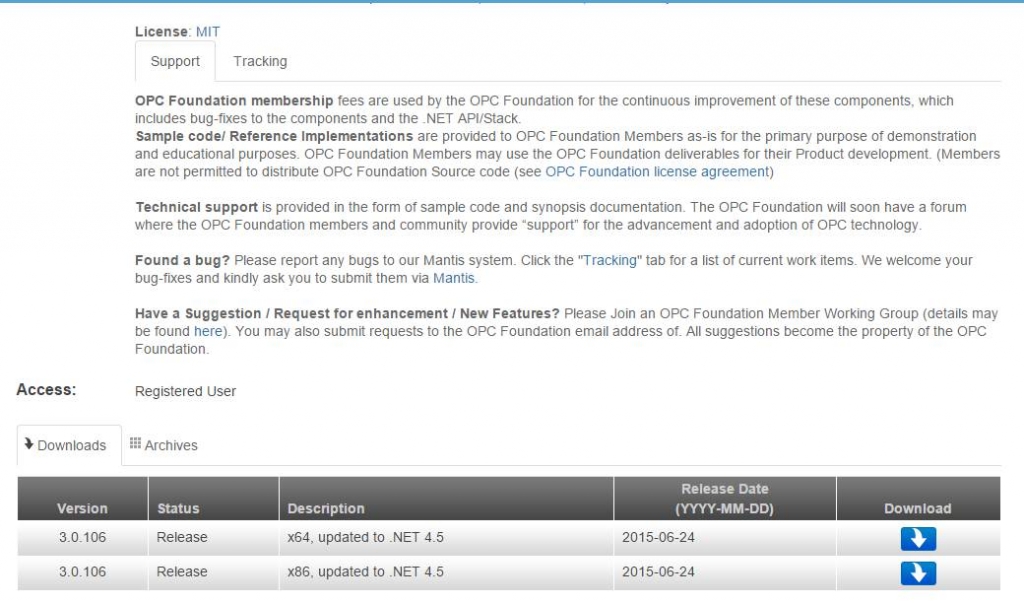
1.1 Download the OPC Core Components Redistributable
- Go to the OPC Foundation’s website here.
- Download the latest release for your server and Windows architecture (x86 or x64).
- This will require you to register first, but that is a free and easy process.
1.2 Install the OPC Core Components Redistributable
- Extract the contents of the downloaded zipped file.
- Run the executable setup file.
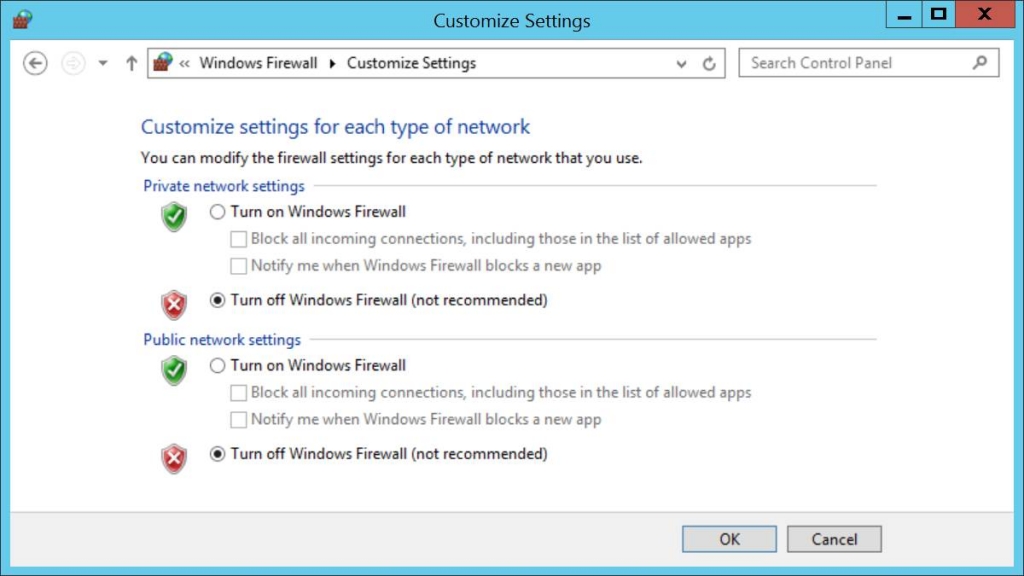
Step 2: Remove Windows Security on Both Servers
- Go to Control Panel and click on Windows Firewall.
- Click on Turn Windows Firewall on or off from the left-side menu.
- Choose Turn off Windows Firewall (not recommended) on both Private and Public network settings.
Step 3: Establish Mutual User Account Recognition
To enable both servers to communicate with one another, it is necessary to create the same user account with administrator privileges on both machines. The user accounts must have the same username and password (make sure to have the exact same spelling).
A couple of things to keep in mind:
- The user account must have a password.
- The user account must be an administrator.
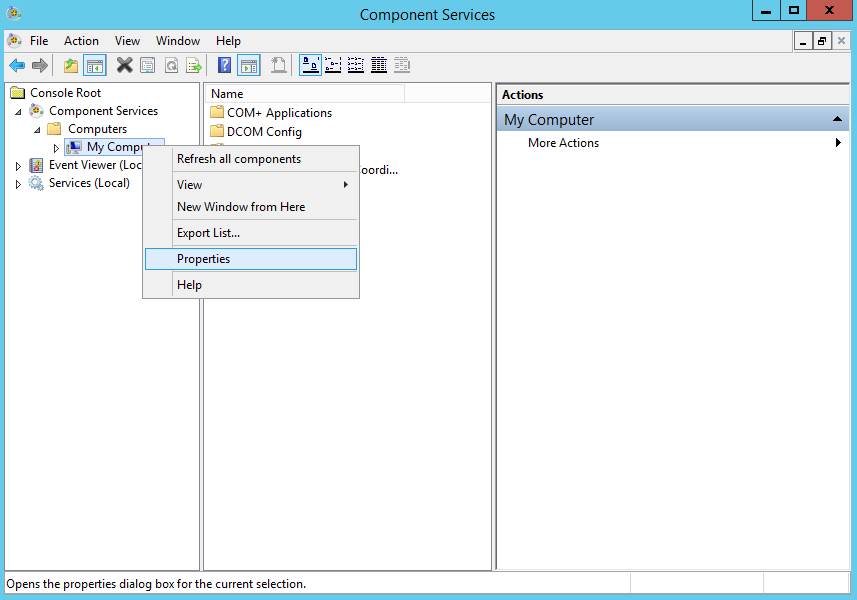
Step 4: Configure DCOM Settings on the Ignition Server
In this step we will configure the system-wide DCOM settings, which will in turn affect all Windows applications that use DCOM.
- Click on the Windows Start button and type DCOMCNFG then hit Enter to open the Component Services window.
- Expand the Component Services folder on the left-hand side and then expand the Computers folder.
- Right-click on My Computer under the Computers folder and select Properties.
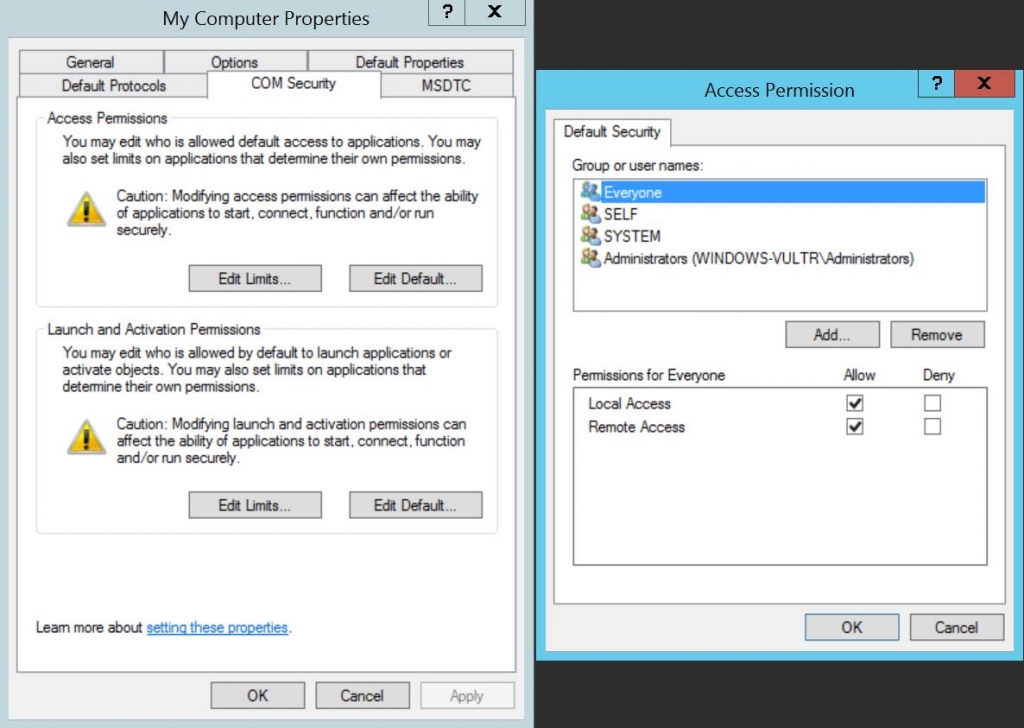
4.1 Configure COM Security – Access Permissions Defaults
- Click on COM Security tab.
- Click the Edit Default… button under Access Permissions.
- Add Everyone to the list of Group or user names.
- Allow all permissions for Everyone.
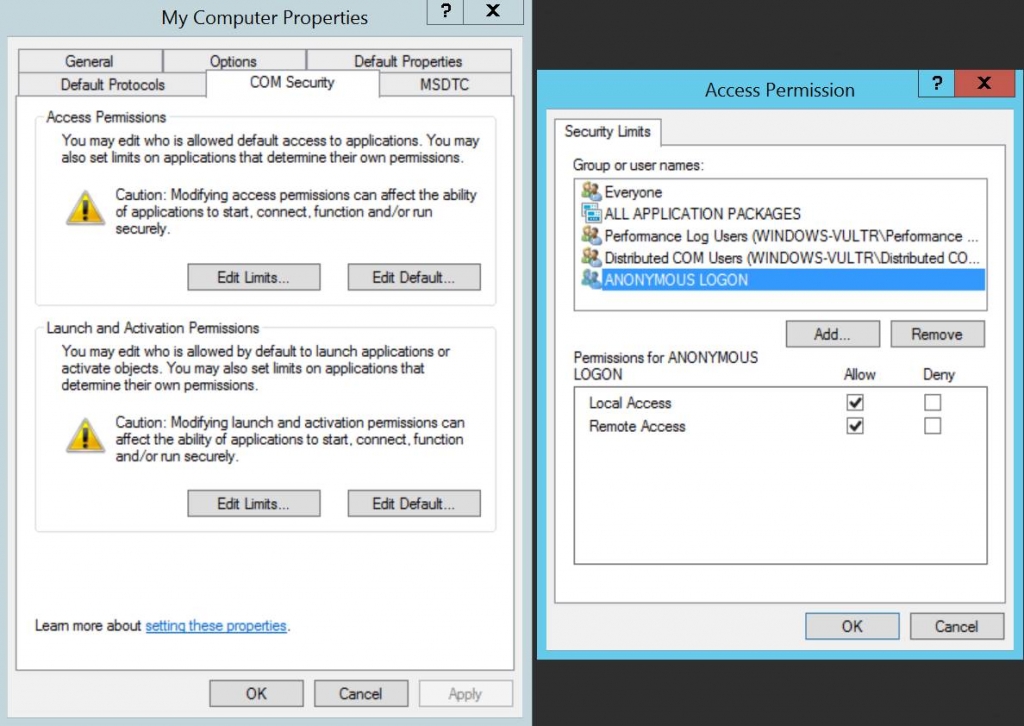
4.2 Configure COM Security – Access Permissions Limits
- In the COM Security tab click the Edit Limits… button under Access Permissions.
- Add Anonymous Logon to the list of Group or user names.
- Add Everyone to the list of Group or user names.
- Allow all permissions for Anonymous Logon and Everyone.
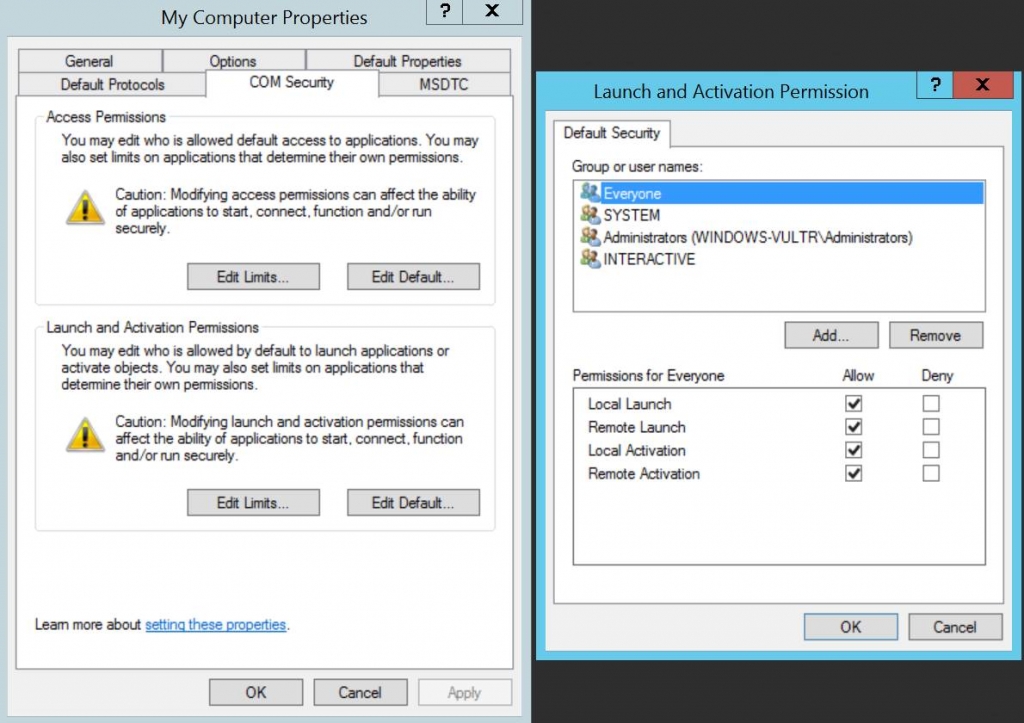
4.3 Configure COM Security – Launch and Activation Defaults
- In the COM Security tab click the Edit Defaults… button under Launch and Activation Permissions.
- Add Everyone to the list of Group or user names.
- Allow all permissions for Everyone.
4.4 Configure COM Security – Launch and Activation Limits
- In the COM Security tab click the Edit Limits… button under Launch and Activation Permissions.
- Add Everyone to the list of Group or user names.
- Allow all permissions for Everyone.

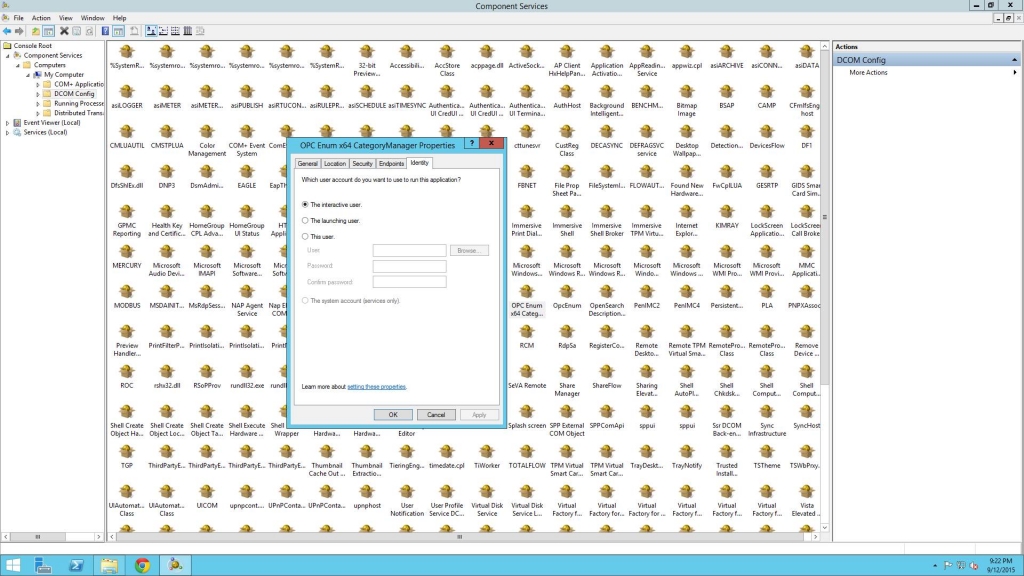
Step 5: Configure DCOM Settings on the ACM Server
- Click on the Windows Start button and type DCOMCNFG then hit Enter to open the Component Services window.
- Expand the Component Services folder, then expand the Computers folder, and finally expand My Computer.
- Open the DCOM Config folder.
- Find OPC Enum x64 Category Manager and right-click on it and select Properties.
- In the Identity tab select The interactive user.
Step 6: Configure the Services to Use the Same User Account
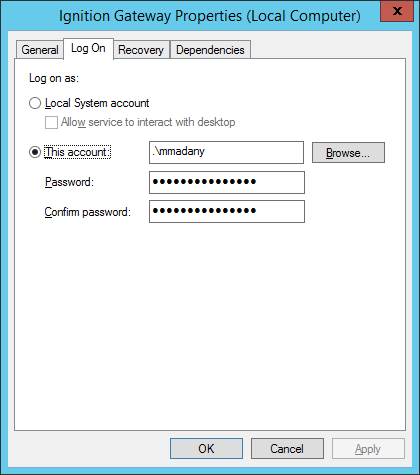
6.1 Configure User Account for Ignition Gateway Service
- Open up the system’s Services in the Ignition server.
- Right-click on Ignition Gateway and choose Properties.
- In the Log On tab choose This account.
- Enter the user account’s credentials that you created in Step 3.
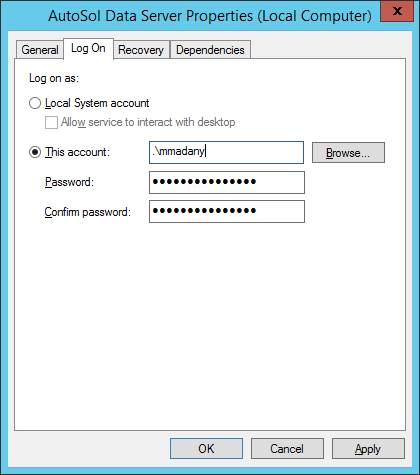
6.2 Configure User Account for AutoSol Data Service
- Open up the system’s Services in the ACM server.
- Right-click on AutoSol Data Service and choose Properties.
- In the Log On tab choose This account.
- Enter the user account’s credentials that you created in Step 3.
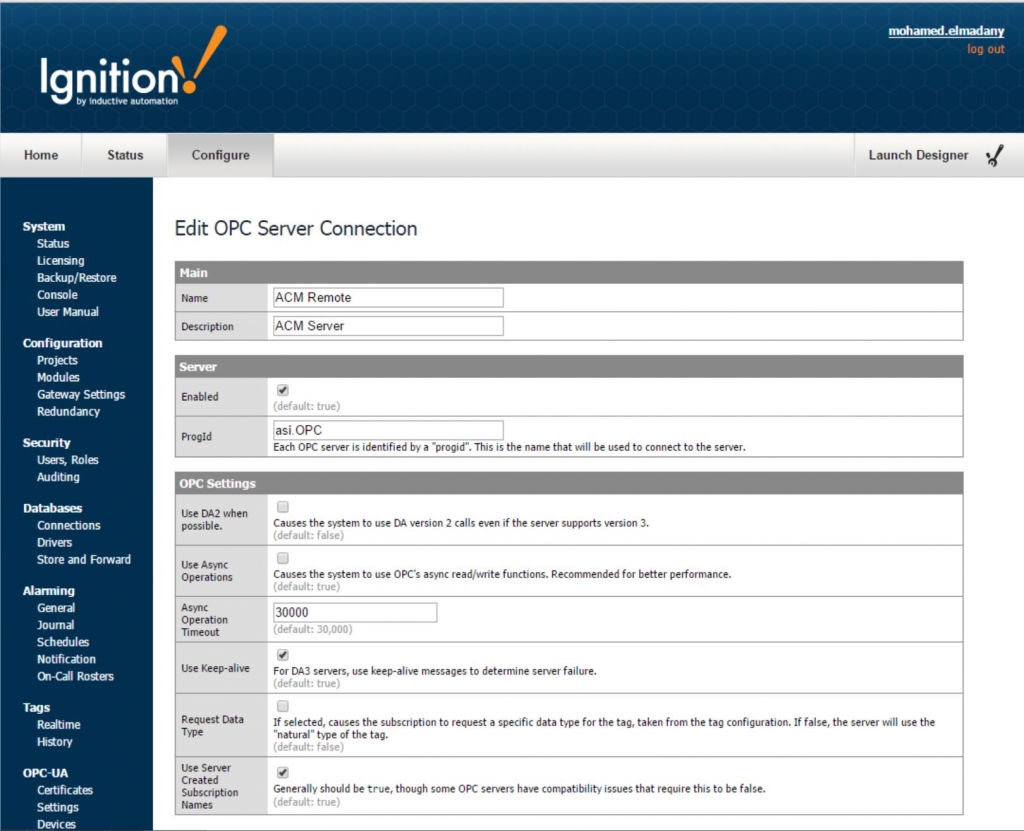
Step 7: Create an OPC-DA Connection in Ignition
- Navigate to the Ignition Gateway Configuration section (e.g. http://localhost:8088/main/web/config).
- Under OPC Connections select Servers.
- Click on Create new OPC Server Connection…
- Choose the OPC-DA COM Connection option.
- Since our OPC server is on a separate machine, we will choose the Remote option.
- Specify the IP address or host name of the machine the OPC server resides on.
- Select Other Server.
- The most important setting to configure is the ProgId. This is used to look up the CLSID of the OPC server in the Windows Registry and without this a connection cannot be made. This should be set to asi.OPC.
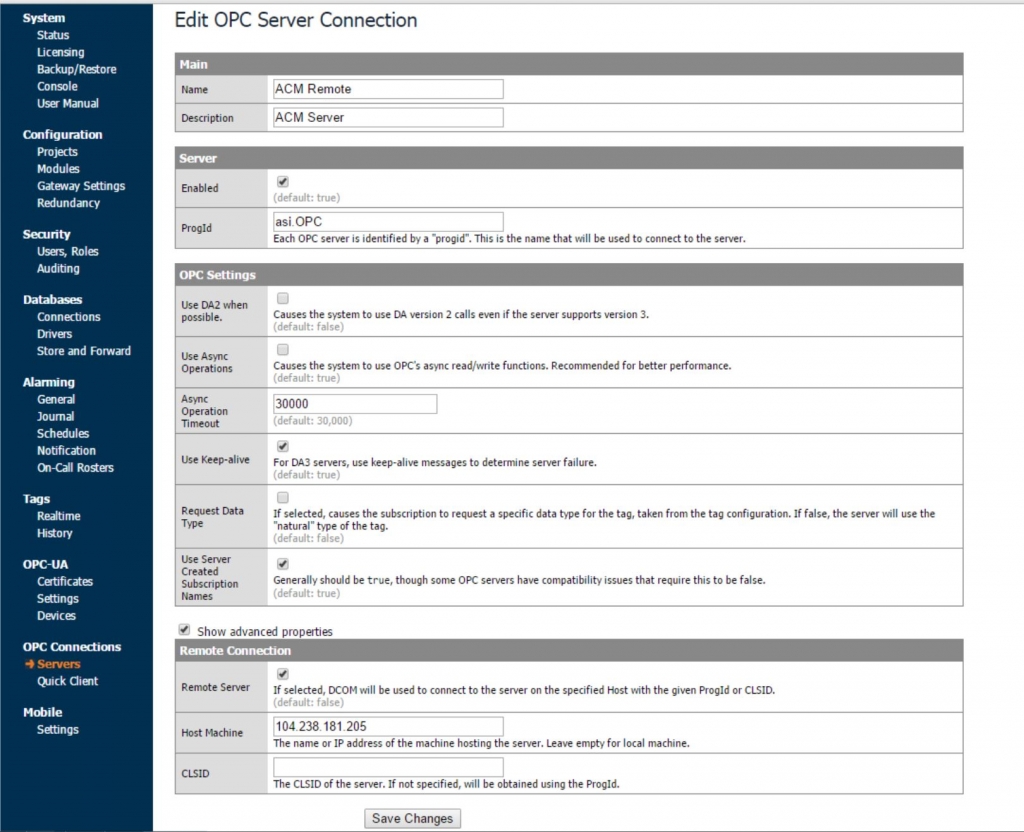
- Uncheck Use Async Operations.
- Click on Show advanced properties.
- Check the Remote Server setting and specify the IP address or host name of the ACM machine in the Host Machine setting.
- Click Create New OPC Server Connection.
- The status of your connection will read “Connected” if Ignition was able to successfully connect to the OPC server.
why not Kepware? Why ever ever Autosol?
It all depends on the client. Many of our clients in the Oil and Gas sector have Autosol ACM and they just want to upgrade their SCADA system without the added expense of upgrading the I/O server too. Asides from that, Autosol’s scheduler is far more superior to Kepware’s. It also provides us more in depth communication statistics. Those can be very handy when troubleshooting the slow and choppy serial communications in Oil and Gas. Still, Kepware is our go-to solution for clients that have better network setups. I for one would always prefer to use OPC-UA and I’m hopeful that Autosol will work on an OPC-UA version for ACM.